

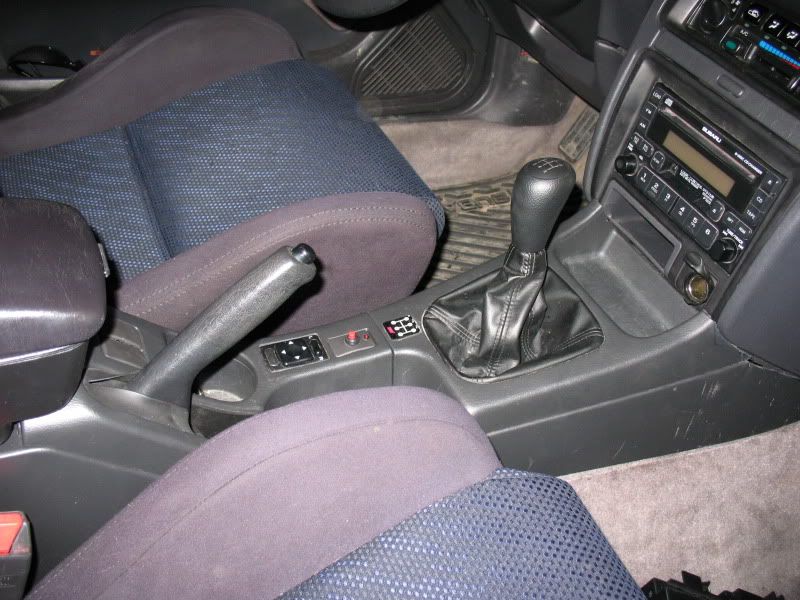
A buddy is replacing his center console with a carbon fiber one and offered my his STi center piece. Anyone done that yet? I seem to remember a lot of trimming being needed...

 Thanks: 0
 Likes: 0
A buddy is replacing his center console with a carbon fiber one and offered my his STi center piece. Anyone done that yet? I seem to remember a lot of trimming being needed...
Well Ill take some photos soon of his console.
You have to trim away a bit under the radio. Ill dig up pics later
WRX Center Console Swap
This guide came from SL-i and was written by anothernord
Link to the original thread is here
This DIY will allow you to swap the center console from an 02/03 WRX to a 96-99 B-whatever. 04/05 consoles will also fit. And as always, I'm not responsible for anything you do to hurt yourself, your car, or someone else.
This DIY was done on a 97' Outback.
Tools Required:
-Hacksaw (I used a portable bandsaw)
-Pliers
-Screwdriver
-Dremel or something similar
-10mm, 12mm sockets
~~~~~~~~~~~~~~~~~~~~~~~~~~~~~~~~`
1) Start by removing your stock center console. I won't go into detail here, but basically get your phillips screwdriver and undo every screw you can find in the center console. Don't forget the ones in the storage bin.
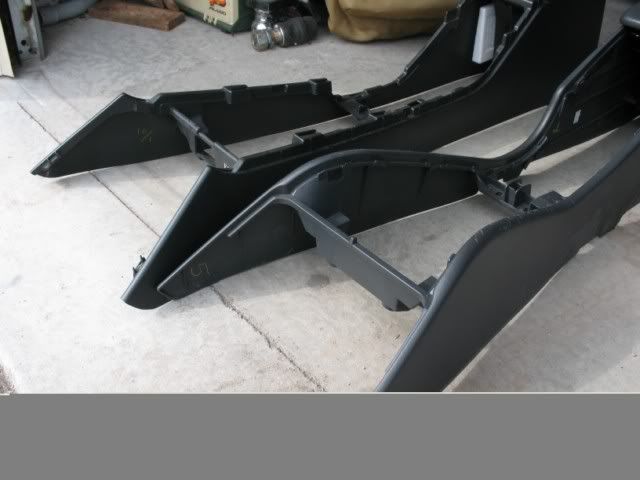
2) Remove your stock console and compare it to your WRX console, to get a preview of how much you will have to trim off the WRX unit.
**NOTE** Try fitting the console first before you do the follow steps; the bracketry varies from year to year. 1995's do not have to have the shock sensor or storage bin bracket modified.
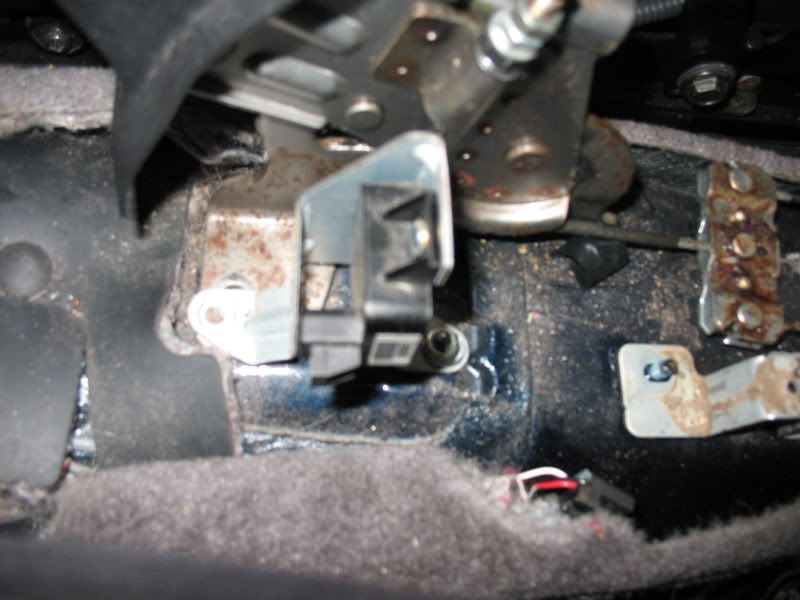
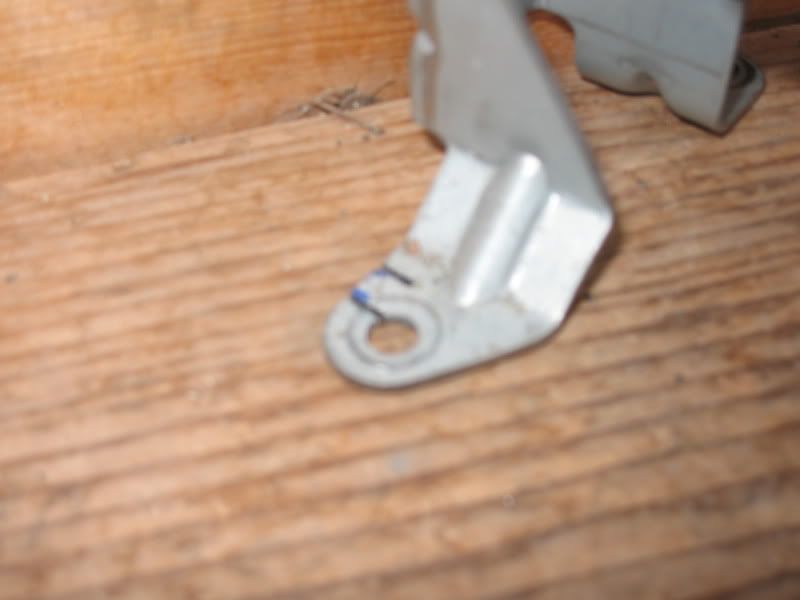
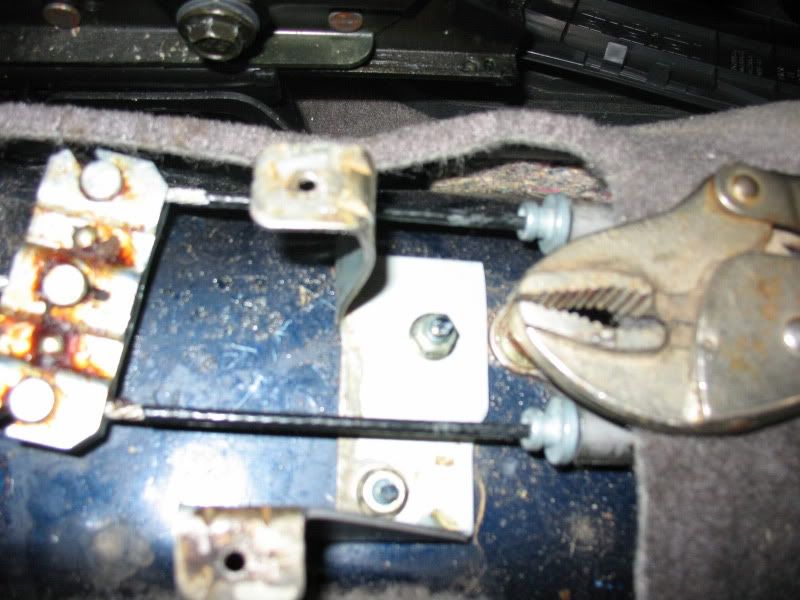
3) Before you start cutting there are a few modifications that have to be done to the guts underneath the area where the console sits; The airbag G-sensor must be moved forward to allow the storage bin of the WRX console to fit.
4) Carefully unplug and unbolt the sensor, taking care not to drop or shake it.
5) Unbolt the front 12mm E-brake bracket bolt, and set the G-sensor with the back of the bracket on what used to be the front stud, and mark where to cut a slot on the front-side of the bracket so it can fit under the 12mm E-brake bolt.
NOTE: it is helpful to have the E-brake all the way released so there isn't any tension on the cables that will pull the bracket backwards.
6) Cut a slot with your hacksaw in the G-sensor's bracket where you marked it. Then use your pliers to bend the little tab between the cuts back and forth until it breaks off.
7) Now bolt the sensor into it's new location with the 12mm and 10mm bolt and nut, respectively.
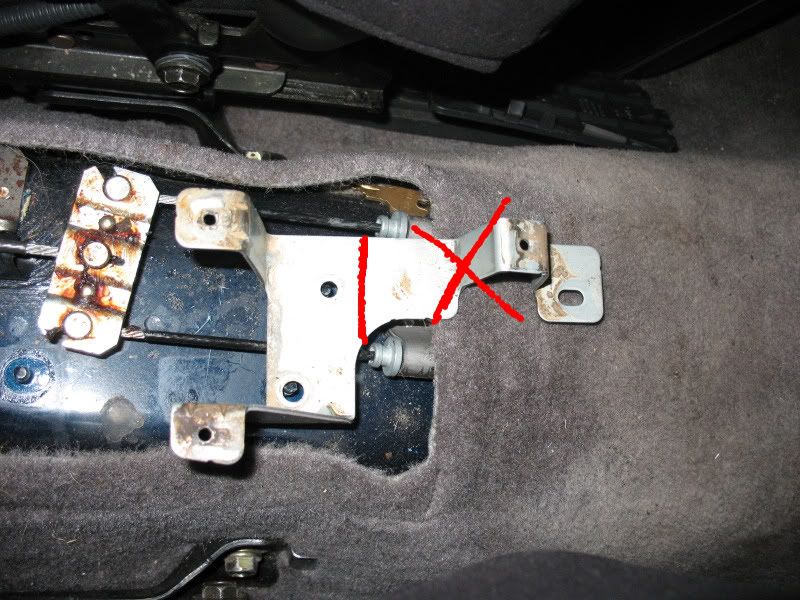
8) The bracket that the stock storage bin bolts to will not line up with the WRX console's holes. It will have to be modded to line up partially with the new console.
9) Using your hacksaw, cut off the right half of the bracket, and bolt it in as shown.
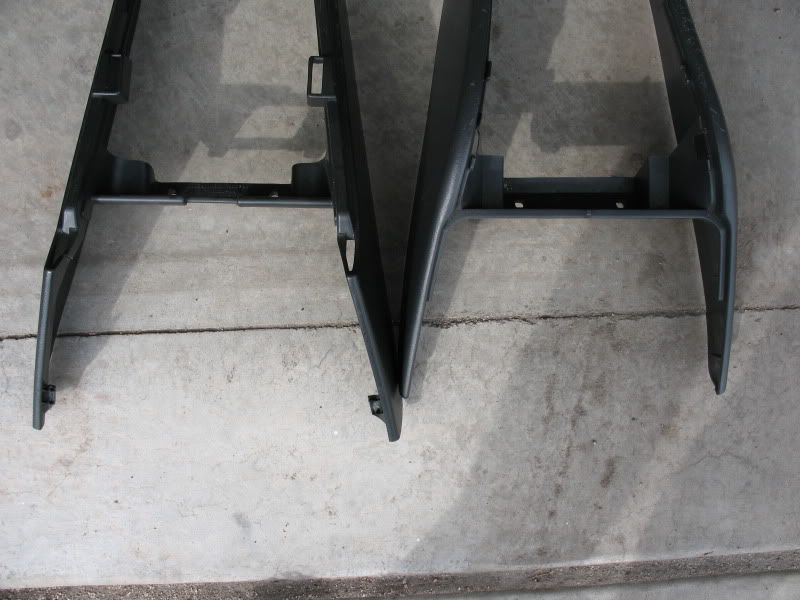
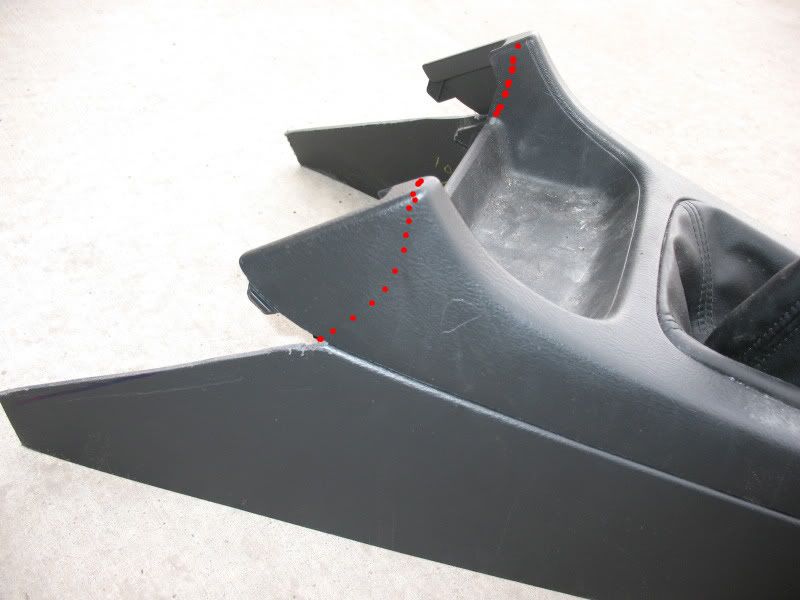
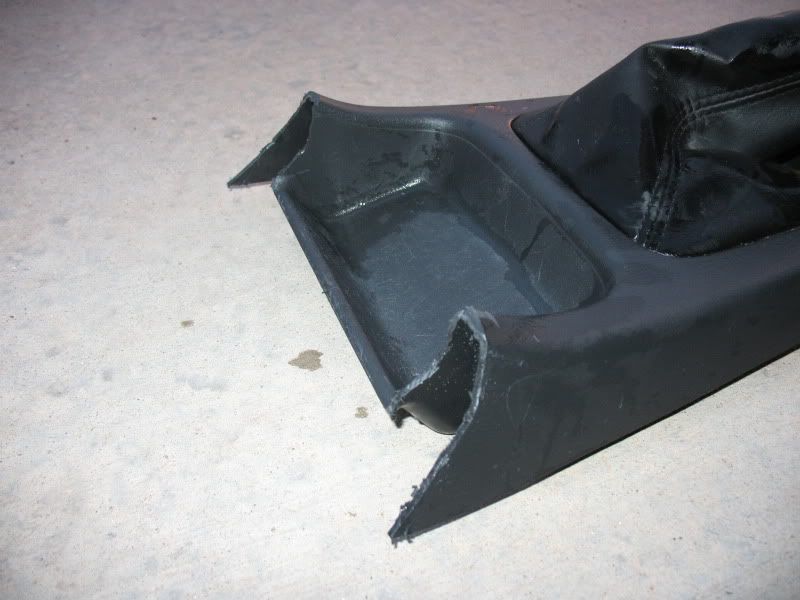
10) This is the hardest part of the whole install. Now get your saw and start cutting small amounts of plastic from the WRX console so it matches your stock dash. The best way to do this is to take off small amounts at a time, and pull the console in and out of the car. It gets a little tedious, but the more time you spend, the better it will look.
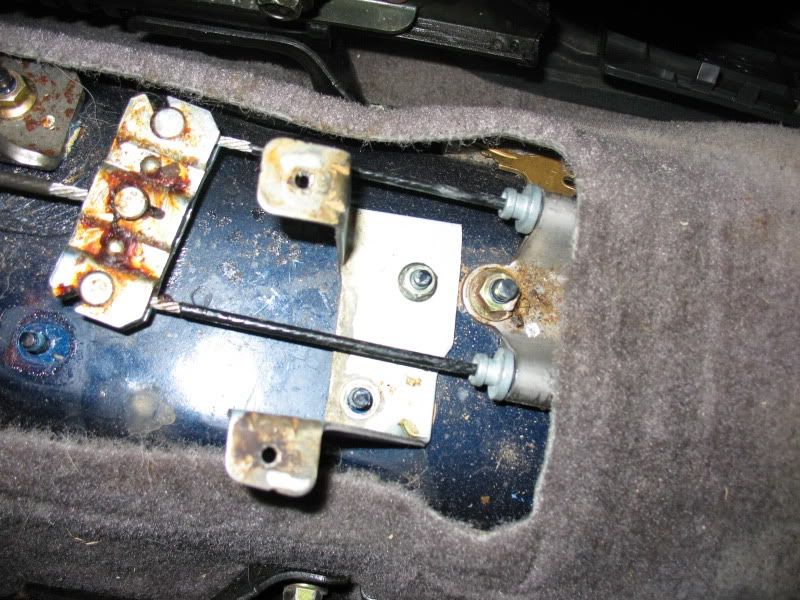
11) Once you have cut off enough material to allow the front and middle screw holes to line up, remove the console, grab your pliers, and turn your attention back to the bracket you bolted in behind the E-brake earlier. Bend the mounting point on the passenger side so it matches the screw hole in the bottom of the WRX console's storage bin. The other mounting point is too hard to bend, so I left it alone. It's still just as sturdy.
It should look something like this:
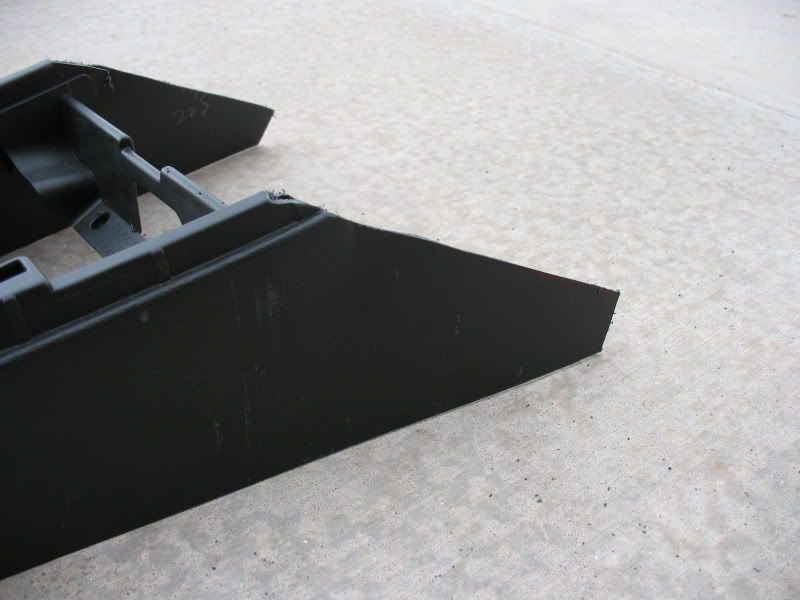
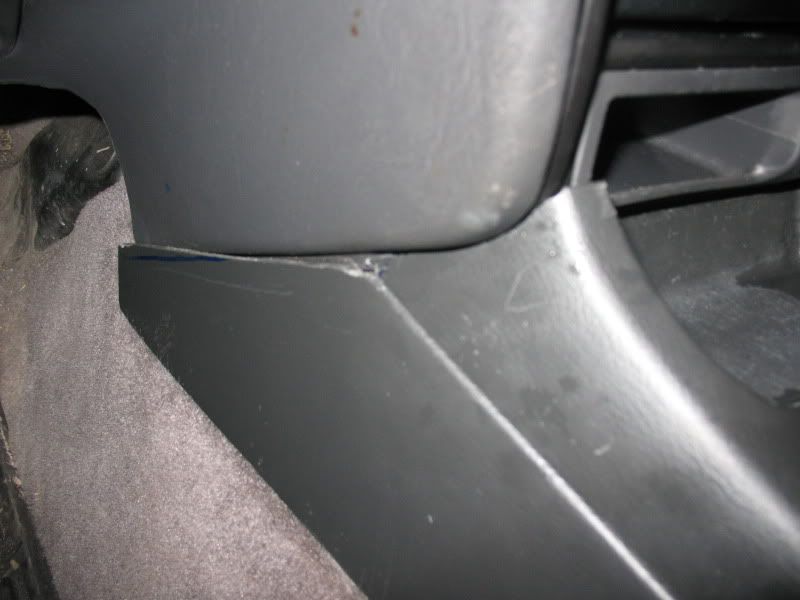
12) Once you're satisfied with the fitment of the big bottom piece of the WRX console, turn your attention to the shifter trim. You want to emulate the upward curve of the radio surround piece. The step is most easily done with a dremel after cutting off the largest of the unneeded portion of the trim with a hacksaw. This step the the hardest to get right, because you have to cut a curve in the piece.
As you can see, I didn't get it perfectly matched with the dash, but it looks fine otherwise. The storage bin in front of the shift boot perfectly matches the bottom of the dash, with almost no gap.
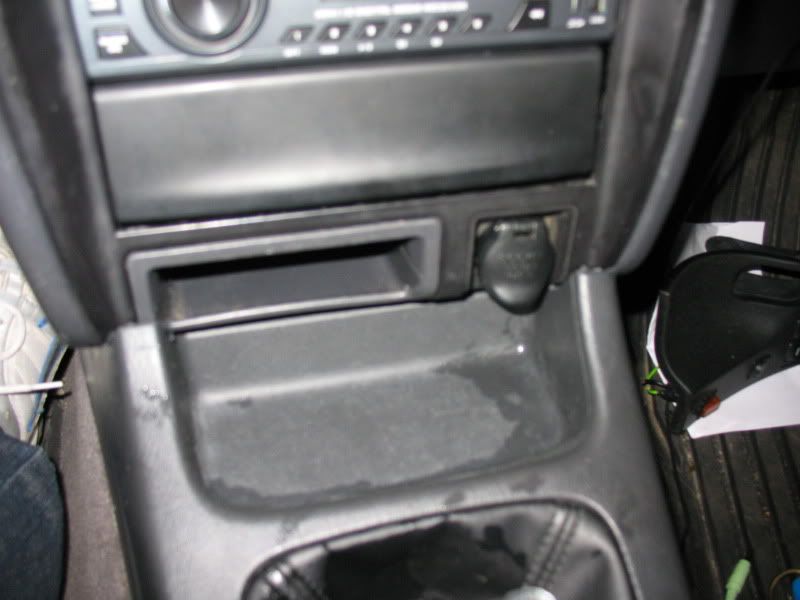
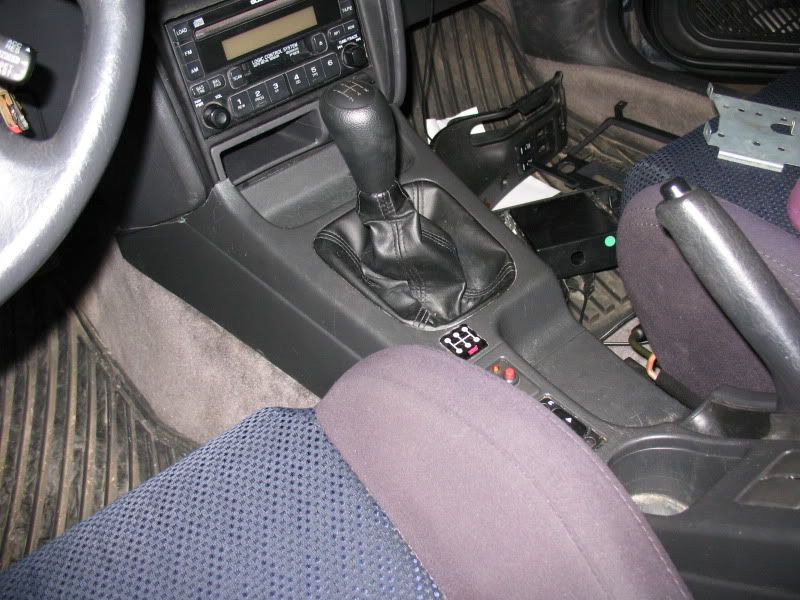
13) Snap on the rear trim piece, and put your shift knob back on.
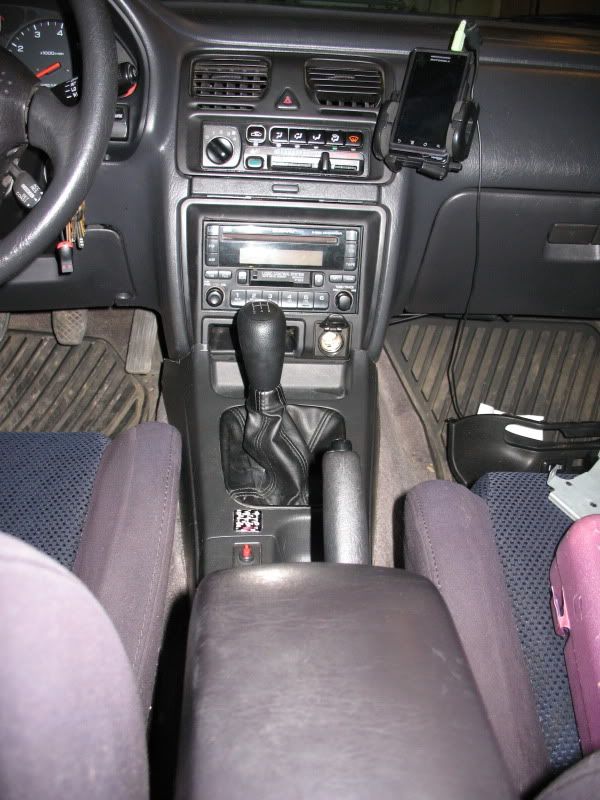
Enjoy your fancy new console, complete with a cupholder! Also, the mirror switch plugs in perfectly to the stock harness, so if you want, you can extend the wires for your power mirrors down to the center console to make that switch functional!
If you have any questions, don't hesitate to ask.
-Jared
^That guy needs to learn how to use a bandsaw, or something...those cuts look awful rough.
Thank God I have a Dremel!Originally Posted by Eon_Blue

and thanks John.
No problem man.


Dremel FTW. those cuts did nothing but piss me off lol
Dremels are the way to go with something like that..and yeah, those cuts kind of made me question "Why make a DIY thread" if the presentation looks like someone tossed it into a blender..no point in even making something to show the crappy cutting job
REMEMBER! Make a mold like I suggested on LGT! It's probably the most important thing to do in order to make it seamlessly fit. Otherwise, you only have to worry about the color difference.
 Posting Permissions


Bookmarks